Category: Travel Content

  • Iwaya Caves Enoshima: The Wild, Windy, Slightly Unhinged Side of the Island You Didn’t Expect

    Enoshima has a reputation.

    It’s marketed as an easy island stroll. Shrines, seafood, sea breeze. Very approachable. Very “nice half-day trip.”

    And that’s true—until you keep walking.

    Because once you reach the far edge of the island, where the land narrows and the cliffs face the open sea, Enoshima shifts. The crowds thin out. The paths get rougher. The wind gets louder. And suddenly, you’re standing in front of the Iwaya Caves, realizing this island has been holding back.

    The Iwaya Caves aren’t just another attraction. They’re the moment Enoshima stops being cute and starts being ancient, dramatic, and a little intense—in the best possible way.

    Red fencess Entrance to Iwaya Caves


    You might want to read:

    What the Iwaya Caves Really Are (And Why They Matter)

    The Iwaya Caves are natural sea caves formed over hundreds of years by relentless wave erosion against Enoshima’s rocky cliffs. This isn’t a man-made tunnel or a staged experience—it’s geology doing what it does best, slowly and violently shaping land.

    Historically, these caves weren’t visited for fun. They were places of religious devotion and ascetic practice. Monks, pilgrims, and spiritual practitioners believed the caves were sacred, closely tied to Benzaiten, Enoshima’s most important deity associated with water, music, fortune, and wisdom.

    That history explains why the caves don’t feel like a theme park attraction. The space is intentionally preserved with minimal interference. The lighting is low. The walkways are narrow. The mood is quiet. You’re meant to experience the caves—not breeze through them.

    There are two main cave sections, often called the First Cave and Second Cave. The first feels deeper and more primal, with tighter passageways and heavier atmosphere. The second opens up slightly and includes more religious elements, reminding you that this place once functioned as a spiritual destination, not a sightseeing stop.

    Why Taking the Ferry From Bentenmaru Pier Changes Everything

    View from Ferry going to Iwaya Caves

    You can reach the Iwaya Caves on foot, but taking the ferry from Bentenmaru Pier fundamentally changes how the experience unfolds.

    The ferry ride is short, but it reframes Enoshima completely. From the water, the island looks less like a tourist destination and more like a rugged outcrop battling the sea. The cliffs are sharper. The waves feel louder. You understand why people once viewed this place as powerful—and maybe even dangerous.

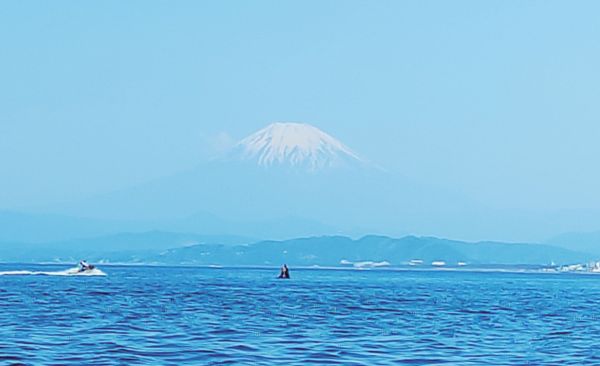
    And then there’s the Mt. Fuji factor.

    On a clear day, the ferry route offers one of those quietly spectacular moments where Mt. Fuji appears on the horizon, distant and understated. It’s not framed. It’s not announced. It just… exists. If you catch it, it feels like a reward for choosing patience over convenience.

    Even when Mt. Fuji doesn’t show up, the ferry ride sets the tone. You arrive at the caves already tuned into the island’s wilder energy.

    Entering the Iwaya Caves: When the Island Goes Quiet

    Entrance to Iwaya Caves (2)

    The moment you step inside the Iwaya Caves, Enoshima’s noise disappears.

    Sunlight fades. The temperature drops slightly. The sound of waves becomes muffled and echoing. Your footsteps suddenly feel louder than expected.

    Inside, the path is clearly marked but intentionally uneven, reminding you that this is a natural space first and a visitor attraction second. In some sections, ceilings dip low enough that you instinctively duck. In others, the cave opens just enough to let you breathe again.

    Lighting is kept dim, sometimes supplemented by small handheld lights, which adds to the sense that you’re exploring rather than observing. This isn’t about perfect photos. It’s about texture, sound, and atmosphere.

    Most people move slower here—not because they’re told to, but because the space demands it.

    The Spiritual Layer You Feel Even If You’re Not Looking for It

    Even if you don’t arrive interested in history or spirituality, the caves quietly introduce you to Enoshima’s religious past.

    Shrine elements, carved figures, and symbolic markers appear throughout the caves, subtle but intentional. These aren’t decorative add-ons—they’re reminders that people once came here seeking guidance, protection, and insight.

    There’s something grounding about that knowledge. You’re walking where people once stood with very different intentions, yet the space still holds meaning.

    It adds weight to the experience without making it heavy.

    The Exit That Turns the Visit Into a Journey

    Leaving the caves isn’t the end—it’s the transition.

    Instead of heading back the same way, you continue forward and begin the long stair climb back up through Enoshima Island. This climb is often underestimated, but it’s a crucial part of the experience.

    The stairs wind upward through shaded paths, cliffside viewpoints, and forested sections. You’ll stop to catch your breath—and when you do, you’re rewarded with sweeping ocean views that feel earned, not handed to you.

    This climb creates a sense of completion. You went down into the island. Now you’re coming back up.

    By the time you reach the main area of Enoshima again, everything feels brighter, louder, and more alive—almost like re-entering a different world.

    [tp_widget][/tp_widget]

    How to Fit the Iwaya Caves Into Your Enoshima Day

    The Iwaya Caves are best treated as a centerpiece, not a side stop.

    They work beautifully when placed after you’ve explored the island’s lighter attractions. By the time you reach the caves, you’re ready for something deeper, quieter, and more immersive.

    Afterward, the climb back up naturally leads you toward food, cafés, and slower wandering—making the day feel balanced rather than exhausting.

    Why Iwaya Caves Enoshima Work So Well in an Enoshima Itinerary

    The caves add contrast.

    After shrines, cafés, souvenir streets, and coastal paths, Iwaya Caves Enoshima shift the energy. They slow you down. They ground you. They remind you this island wasn’t built for visitors — it existed long before them.

    That contrast is what makes the memory stick.

    Enoshima without the caves feels pleasant.
    Enoshima with the caves feels complete.

    Before You Go: What to Know About Iwaya Caves Enoshima

    Iwaya Caves 2

    This is the part most guides rush — so we won’t.

    Visiting Iwaya Caves Enoshima is easy, but knowing what to expect makes the experience smoother, safer, and way more enjoyable.

    Entrance Fee and Tickets

    The Iwaya Caves Enoshima entrance fee is affordable and straightforward. You pay on-site before entering the caves.

    Cash is recommended, especially during busy days when card systems can slow things down. There’s no time limit once inside, which means you’re free to explore at your own pace — a big win for anyone who hates being rushed through atmospheric places.

    Ferry vs Walking: Which Should You Choose?

    If the Bentenmaru ferry is operating, take it.

    Not because walking is bad — but because the ferry adds a narrative arc to the experience. You arrive by sea, explore underground, then climb back through the island. It turns the visit into a loop instead of a straight line.

    That said:

    • The ferry may stop during rough seas or bad weather
    • If it’s not running, walking is still completely doable

    Just know that walking both ways can feel long, especially after the cave visit and stair climb.

    What to Wear (This Matters More Than You Think)

    The Iwaya Caves are naturally damp. The paths inside can be slick, and the stair climb afterward isn’t gentle.

    Wear:

    • Closed shoes with good grip
    • Something light but breathable
    • Layers if visiting outside summer

    Avoid:

    • Slippery sandals
    • Shoes you don’t want near seawater
    • Anything too rigid or heavy

    This is not a fashion stop — it’s a movement stop.

    Best Time to Visit Iwaya Caves Enoshima

    Timing changes the entire experience.

    The best time to visit Iwaya Caves Enoshima is:

    • Late morning to early afternoon
    • On clear days (for Mt. Fuji visibility)
    • On weekdays if possible

    Earlier visits mean:

    • Fewer people inside the caves
    • Better light outside before entering
    • Less congestion on the stairs afterward

    Sunset is beautiful, but be mindful of closing times and ferry schedules.

    How Long to Allocate for the Full Experience

    People underestimate this — and then rush.

    For a complete Iwaya Caves Enoshima experience, plan:

    • 15–20 minutes for the ferry (including waiting)
    • 30–45 minutes inside the caves
    • 30-45 minutes for the stair climb and scenic stops

    That’s roughly 2 to 2.5 hours, not counting food or wandering before and after.

    It’s not a quick stop — and that’s the point.

    Wrap Up: Why the Iwaya Caves Feel So Memorable

    The Iwaya Caves don’t rely on spectacle. They don’t rush you. They don’t explain themselves too much.

    Instead, they let Enoshima speak through rock, water, and silence.

    Between the ferry ride, the possibility of seeing Mt. Fuji, the atmospheric caves, and the stair climb back into daylight, this experience feels layered and physical in a way most island visits aren’t.

    You don’t just see the Iwaya Caves.
    You move through them.
    You feel them.

    And once you’ve been there, Enoshima stops being “just a nice island” and starts feeling like a place with a much deeper story.

  • Things to Do in Kamakura: A Choose-Your-Own Adventure Day Trip

    Kamakura is one of those places people think they understand.

    Big Buddha. Temples. Day trip. Done.

    But if you actually step off the train and pause for five seconds, you’ll realize Kamakura is secretly a branching storyline. And yes—there are so many things to do in Kamakura that the real challenge isn’t finding attractions, it’s deciding how to experience them without turning your day into a speedrun.

    The trick? Knowing where to go, when to go, and which exit to use.


    You might want to read:

    What to Do in Kamakura for a Day (Without Burning Out)

    If you only have one day in Kamakura, don’t panic. You don’t need to see everything. Kamakura works best when you let it flow instead of forcing a checklist.

    A well-balanced day usually looks like this:

    • Morning: temples and shrines while energy is high
    • Midday: food, streets, and light wandering
    • Afternoon: quieter spots or scenic areas

    This rhythm keeps the day exciting but manageable—and lets the city surprise you instead of overwhelm you.

    Kamakura Station has two main exits, and this is not just a logistical detail—it’s a strategy.

    Pick wrong, and you’ll backtrack or waste energy.
    Pick right, and your day just works.

    West Exit: Walkable Routes, Hidden Gems, and Underrated Stops

    The West Exit is ideal if you enjoy walking and discovering places that aren’t always highlighted online. This side of Kamakura feels quieter, more residential, and refreshingly unpolished.

    Sasuke Tunnel: Blink and You’ll Miss It

    Sasuke Tunnel is short, quiet, and strangely easy to overlook—but walking through it immediately changes the mood.

    It’s one of those places that makes Kamakura feel layered, like the city hides small passageways just for those paying attention.

    Pair this with Sasuke Inari Shrine for maximum effect.

    Sasuke Inari Shrine (Free Entrance)

    Sasuke Inari Shrine
    Foxes on Sasuke Inari Shrine

    Unlike more famous shrines, this one requires a short uphill walk through greenery. The result? Fewer crowds, more atmosphere, and a sense that you’ve stepped into a side quest. Torii gates, fox statues, and a calm, forested setting make this stop feel personal.

    Sasuke Inari Shrine doesn’t announce itself.

    You walk uphill. You question your map. You wonder if you’re lost. And then—torii gates appear between the trees.

    This shrine feels personal and unfiltered. Fox statues, forest paths, and near-total quiet make it one of the most memorable underrated things to do in Kamakura.

    Entrance fee: Free

    Kotoku-in (Great Buddha of Kamakura)

    kotokuin shrine Buddha

    From Sasuke Inari, it’s an easy transition toward Kotoku-in, home of the iconic Great Buddha.

    Yes, it’s popular—but when you arrive here after a quieter stop, the experience feels more grounded. The scale, detail, and presence of the statue land harder when you’re not rushing.

    Entrance fee: 300 yen (additional fee to enter inside the Buddha)

    Goryo Shrine and the Tanaka Barbershop Area

    Goryo Shrine

    Goryo Shrine itself is modest, but the surrounding area is where this stop shines. The nearby Enoden tracks, narrow streets, and local businesses—especially around Tanaka Barbershop—offer a glimpse into everyday Kamakura life.

    The Enoden tracks pass right nearby, and the neighborhood feels lived-in rather than curated. This is where Kamakura stops being a destination and starts feeling like a town.

    Tanaka Barbershop

    This is a pause point. Not a photo rush

    Hasedera Temple: One of Kamakura’s Must-See Spots

    No list of things to do in Kamakura is complete without Hasedera Temple.

    Known for its hillside views, gardens, and serene atmosphere, Hasedera offers variety in one stop. You’ll find statues, walking paths, seasonal flowers, and viewpoints overlooking the coast.

    This is a great mid-morning or early afternoon stop when you want something visually rewarding but not exhausting.

    Hasedera Temple entrance fee: 400 yen

    Underrated Things to Do in Kamakura: West Exit Route (Side Quests Included)

    The West Exit is where Kamakura starts feeling like a collection of side quests.

    This route is best for travelers who enjoy:

    • Walking
    • Slight detours
    • Discovering places that don’t shout for attention

    Cape Inamuragasaki: A Soft, Scenic Exit

    Ending the West Exit route at Inamuragasaki Coast is a quiet win.

    Cape Inagasaki

    The coastline is open, breezy, and far less hectic than more famous seaside spots. It’s perfect for:

    • Sunset walks
    • Mental decompression
    • Letting the day wind down naturally

    After temples and tunnels, the ocean feels like a release.

    East Exit: Buses, Coverage, and Easy Access to Major Attractions

    East Exit Kamakura

    The East Exit is best if you want flexibility and wider coverage. This side of the station connects directly to bus routes that take you to multiple attractions without long walks.

    Hokokuji Temple and Bamboo Forest

    If you’re searching for a bamboo grove in Kamakura, Hokokuji Temple should be high on your list.

    Hokokuji Temple and Bamboo Forest

    Its bamboo forest is calm, scenic, and far less crowded than other famous bamboo spots in Japan. The walking path is short but memorable, perfect for slowing down and resetting your pace.

    Entrance fee: 300 yen

    Komachi Street Kamakura: Where to Eat, Shop, and Reset

    After temples and walking, Komachi Street Kamakura is where you slow things down.

    Located near the station, this lively street is packed with food stalls, cafes, souvenir shops, and casual restaurants. It’s the perfect place to recharge, people-watch, and snack your way through the afternoon.

    Pro tip: Visit earlier in the day for fewer crowds, or later in the afternoon once temple hopping is done.

    Underrated Things to Do in Kamakura: East Exit Route (For Quiet Explorers)

    If you’re exiting Kamakura Station via the East Exit and you’re willing to —or hop on a bus—you unlock a stretch of Kamakura that feels calmer, older, and wildly underexplored.

    This side is perfect if you want temples with atmosphere, not crowds.

    Hokaiji Tunnel: A Shortcut That Feels Like a Glitch in the Map

    Hokaiji Tunnel doesn’t feel like an attraction—and that’s exactly why it’s interesting.

    It’s a quiet pedestrian tunnel cutting through Kamakura’s hills, often used by locals rather than visitors. Walking through it feels oddly cinematic: dim lighting, cool air, and a brief pause from the outside world.

    Important note:
    Hokaiji Tunnel is not on the same route as Sugimoto, Jomyoji, or Hokokuji. It’s best visited on a separate walk or paired with other East Exit wandering, rather than forced into the temple route.

    Think of it as a mood stop, not a checklist stop.

    Sugimoto Temple: Kamakura’s Oldest, and Somehow Still Overlooked

    Sugimoto Temple is often skipped—and that’s a mistake.

    Known as Kamakura’s oldest temple, this spot feels quietly powerful. The steep mossy steps leading up to the temple immediately set the tone: slow down, watch your footing, and take it in.

    It’s not flashy. It doesn’t try to impress.

    But the age, the calm, and the lack of crowds make it one of the most grounding places to visit from the East Exit.

    Jomyoji Temple: The Soft Transition Spot

    From Sugimoto Temple, the route naturally flows toward Jomyoji Temple.

    This temple feels like a breather—open grounds, traditional architecture, and a slower pace that invites you to linger. It’s a great place to reset before continuing deeper into the area.

    If Kamakura temples had personalities, Jomyoji would be the calm friend reminding you there’s no rush.

    Hokokuji Temple: Bamboo, Balance, and a Perfect Ending

    Ending this route at Hokokuji Temple just makes sense.

    The Hokokuji Bamboo Forest is peaceful, contained, and intentionally quiet. It’s not a long walk, but it doesn’t need to be. The bamboo grove works as a mental full stop after a temple-heavy morning.

    And the best part?
    Jomyoji and Hokokuji are already along the way from Sugimoto Temple, so the route feels natural instead of forced.

    This East Exit path is ideal if you want:

    • A calm half-day
    • Fewer crowds
    • A more reflective Kamakura experience
    [tp_widget][/tp_widget]

    East Exit or West Exit? Here’s the Quick Take

    • East Exit: Best for temple lovers, bamboo forests, and calm half-day routes (Sugimoto → Jomyoji → Hokokuji)
    • West Exit: Best for walkers, hidden paths, and atmospheric stops (Sasuke Tunnel → Sasuke Inari → Goryo Shrine → Coast)

    Both are great. The real mistake is trying to do everything at once.

    Best Day to Go to Kamakura

    If you’re choosing the best day to go to Kamakura, weekdays win—especially Tuesday to Thursday.

    Weekends are lively but crowded, particularly around Kotoku-in, Hasedera, and Komachi Street. If weekends are your only option, start early and prioritize quieter stops first.

    Spring and autumn are especially beautiful, but Kamakura is enjoyable year-round if you pace yourself.

    West Exit Day vs East Exit Day: Mini Itineraries

    West Exit Day: Slow and Discovery-Focused

    Best for travelers who love walking and hidden spots.

    • Exit via West Exit
    • Visit Sasuke Tunnel and Inari Shrine
    • Continue to Kotoku-in
    • Explore Goryo Shrine and Tanaka Barbershop area
    • Visit Hasedera Temple
    • Optional Enoden ride or cafe stop

    East Exit Day: Efficient and Variety-Packed

    Best for first-timers or limited schedules.

    • Exit via East Exit
    • Take bus to Hokokuji Temple
    • Return toward station,
    • Explore on Komachi Street and walk under Dankazura

    Kamakura for Digital Nomads: Stay, Base, or Just Explore?

    If you’re a digital nomad, Kamakura raises a very specific question: Is this a place you stay in—or a place you dip into?

    The honest answer? Kamakura works best as a slow, short-term base or a recurring exploration spot, rather than a long-term hustle city.

    Working From Kamakura: The Reality Check

    Kamakura is calm, scenic, and refreshing—but it’s not built like a coworking capital.

    You’ll find:

    • Small cafés with limited seating
    • Quiet spots that are great for short focused sessions
    • A generally relaxed pace that doesn’t push productivity

    What you won’t find easily:

    • Lots of dedicated coworking spaces
    • Late-night work cafés
    • High-energy networking scenes

    This makes Kamakura ideal for light workdays, writing, planning, editing, or recovery days between busier cities.

    Internet, Cafés, and Work-Friendly Spots

    Internet quality is generally reliable, especially if you’re staying in proper accommodations rather than hopping cafés all day.

    For work sessions:

    • Plan to work from your accommodation
    • Use cafés for short bursts, not full-day marathons
    • Be mindful of peak hours, especially on weekends

    Kamakura values calm—and respecting that makes the experience better for everyone.

    Cost, Convenience, and Connectivity

    Accommodation in Kamakura can be pricier than nearby areas, especially for longer stays. However, its biggest advantage is connectivity.

    You’re:

    • Less than an hour from Tokyo
    • Well-connected by JR and Enoden lines
    • Close enough to dip into city life when needed

    This makes Kamakura a strong option if you want nature + temples + easy Tokyo access without committing to the capital full-time.

    Stay or Explore? The Verdict

    • Stay short-term if you want balance, quiet mornings, and scenic breaks between work
    • Base nearby (like Fujisawa or Yokohama) and explore Kamakura regularly if budget and workspace matter more
    • Day trip if you’re on a tight schedule and just want the highlights

    Kamakura rewards nomads who value rhythm over rush.

    Extra Tips for Digital Nomads Visiting Kamakura

    • Visit temples early to keep afternoons free for work
    • Avoid weekends if you need quiet focus time
    • Use Kamakura as a reset point between faster cities
    • Don’t overschedule—this city works best with breathing room

    Wrap Up: Kamakura Is Best When You Don’t Rush It

    The best things to do in Kamakura aren’t about how many places you visit—they’re about how the day feels. We’ve been to Kamakura for a few times now and I feel like there is still a lot I could find if we’d let our selves get lost and wander.

    Choose the right exit. Mix walking with transit. Leave room for pauses.

    Whether you’re here for a day, a weekend, or a slow nomad reset, Kamakura doesn’t demand your attention—it rewards it.

    And that’s exactly why it stays with you long after you leave.

  • Houkokuji Bamboo Forest and Temple: Kamakura’s Calm, Green Escape

    There are places in Japan that impress you instantly. And then there are places that quietly slow you down before you even realize it.

    Hokokuji Bamboo Forest in Kamakura is very much the second kind.

    This isn’t a loud, checklist destination. It doesn’t demand your attention. Instead, it gently pulls you into a rhythm where footsteps soften, voices lower, and your brain finally stops juggling five thoughts at once. The moment you step into the bamboo grove, the outside world fades — replaced by rustling leaves, filtered light, and a kind of calm that feels earned.

    If you’re looking for a peaceful break while exploring Kamakura, the Hokokuji Bamboo Forest deserves more than a quick stop.


    You might want to read:

    What Is Houkokuji Bamboo Forest?

    The Hokokuji Bamboo Forest is the most famous feature of Hokokuji Temple, a Rinzai Zen Buddhist temple located in eastern Kamakura. The temple is often referred to as “The Bamboo Temple”, and once you see the grove, the nickname makes perfect sense.

    The forest is made up of over 2,000 towering moso bamboo stalks, growing close together and forming a natural green corridor. Unlike bamboo groves that feel like photo backdrops, this one is designed for slow walking and quiet observation.

    Paths gently curve through the forest, encouraging visitors to wander rather than rush. The bamboo sways above you, sunlight shifts constantly, and everything about the space feels intentional — calm without being rigid.

    This is bamboo not as a spectacle, but as an experience.

    [tp_widget][/tp_widget]

    Houkokuji Bamboo Forest and Its History

    Houkokuji Temple was founded in 1334, during a politically unstable period in Japanese history. It served as a family temple for the Ashikaga clan, one of the most influential samurai families of the time, and later the Uesugi clan.

    Scattered around the temple grounds are yagura caves, believed to contain the ashes of Ashikaga family members. These historical elements are subtle, but they add depth to the visit. Beneath the tranquil bamboo forest lies a place shaped by centuries of power, conflict, and reflection.

    That contrast — peaceful bamboo layered over deep history — is part of what makes Hokokuji feel quietly powerful.

    How to Get to Hokokuji Bamboo Forest

    Houkokujin Bamboo Grove and temple

    Getting to the Hokokuji Bamboo Forest is straightforward, but not accidental — which helps preserve its calm atmosphere.

    From Kamakura Station (East Exit)

    By bus (recommended):

    • Take a Keikyu bus bound for the Jomyoji area (routes such as buses 鎌23, 鎌24, or 鎌36)
    • Get off at Jomyoji
    • Walk about 3 minutes to Hokokuji Temple

    On foot:

    • Around 30–40 minutes
    • A pleasant walk through quieter neighborhoods and temple-lined streets

    Arriving here feels like stepping away from Kamakura’s busier areas and into a slower, more reflective side of the city.

    Hokokuji Bamboo Forest Entrance Fee

    One of the most searched questions — and an important one to plan your visit.

    Hokokuji Bamboo Forest Entrance Fee

    • Adults (high school and above): ¥400
    • Elementary & junior high students: ¥200

    This fee gives you access specifically to the bamboo grove area within Hokokuji Temple.

    Matcha Tea Option

    Inside the bamboo forest is a traditional teahouse where you can enjoy matcha and dried sweets while overlooking the bamboo.

    • Matcha service is available until around 3:30 PM
    • A combined ticket (bamboo forest + matcha) is available
    • Seating is limited and first-come, first-served

    The tea experience isn’t rushed and is meant to be enjoyed slowly — very much in line with the forest’s atmosphere.

    What Walking Through Hokokuji Bamboo Forest Feels Like

    This isn’t a place you sprint through, although it’s a not an wide area, it’s actually a small one, but nonetheless best for taking your time.

    As you walk through the Hokokuji Bamboo Forest, you’ll notice:

    • Tall bamboo swaying overhead
    • Narrow paths that naturally slow your pace
    • Shifting light patterns as the sun filters through leaves
    • A quiet that feels natural, not forced

    There are no signs telling you where to stand or what to photograph. You’re free to wander, pause, and simply exist in the space. Many visitors end up staying longer than planned — not because there’s a lot to “do,” but because it feels good to be there.

    Best Time to Visit Hokokuji Bamboo Forest

    Timing can completely change your experience.

    Early Morning

    • Cooler temperatures
    • Fewer visitors
    • Softer, more peaceful light

    Late Afternoon

    • Warmer tones
    • More dramatic shadows
    • Slightly more people, but still manageable

    Weekdays Are Best

    Weekends can be noticeably busier, especially late morning. The forest never becomes chaotic, but its calm is more fragile when crowded.

    Seasonal Notes

    • Spring: Cherry blossoms bloom elsewhere on the temple grounds
    • Early summer: Lush, vibrant green bamboo
    • Rainy season: Atmospheric and beautiful, but paths can be slippery
    • Winter: Quiet, evergreen calm with fewer visitors

    There’s no bad season — only different moods.

    Hokokuji Bamboo Forest for First-Time Visitors

    If this is your first visit, a little preparation helps:

    • Wear comfortable shoes (paths are uneven)
    • Bring water, especially in warmer months
    • Plan to spend 60–90 minutes if including matcha
    • Don’t rush — the forest rewards slow movement

    Savor the time you have here. Take everything in.

    Hokokuji Bamboo Forest for Digital Nomads

    For digital nomads, the Hokokuji Bamboo Forest works best as a mental reset, not a work location.

    There’s no Wi-Fi, no outlets, and no pressure to produce content. Instead, it’s ideal for:

    • Light workdays
    • Planning or reflection days
    • Creative recharge moments

    Visit in the morning, clear your head, then return to work feeling more focused and grounded. It’s intentional rest — and surprisingly effective.

    What to Pair with Hokokuji Bamboo Forest

    To keep the day balanced, pair Hokokuji with nearby, calmer spots:

    • Jomyoji Temple (right next door)
    • Sugimoto Temple (a few meters away from Hokokuji
    • A relaxed lunch or tea stop nearby

    Avoid stacking it with too many crowded attractions. Let this be your slow anchor.

    Why Houkokuji Bamboo Forest Still Feels Underrated

    To be honest, I find Kamakura as a very busy and crowded area. It’s quite too overwhelming for me especially the East Exit. But it also offers very scenic views and beautiful temples too, so for me Houkokuji doesn’t fit the vibe because it doesn’t offer:

    • One viral photo angle
    • A loud, dramatic highlight
    • A fast experience

    What it offers instead is atmosphere, and that’s harder to market — but far more memorable. Visitors who love Hokokuji usually recommend it quietly. And that feels very on-brand.

    Wrap Up: Why Hokokuji Bamboo Forest Stays With You

    The Hokokuji Bamboo Forest isn’t about ticking boxes or chasing photos. It’s about how your body and mind feel while you’re there.

    Calm without being boring.
    Beautiful without trying too hard.
    Historic without feeling heavy.

    If Kamakura ever feels overwhelming, this is where you go to reset.

    And honestly? That kind of calm is rare.

  • Sasuke Inari Shrine in Kamakura: Why This Place Feels Like a Secret You Accidentally Unlocked

    Let’s be very clear from the start: Sasuke Inari Shrine Kamakura is not the kind of place you casually “swing by” between lunch and dessert. This is a shrine you earn. No shortcuts. No escalators. No tour bus drops.

    Hidden deep in the hills of Kamakura, Sasuke Inari Shrine feels less like a tourist attraction and more like a secret level in a game you weren’t supposed to find yet. It’s quiet, atmospheric, slightly mysterious, and criminally underrated. Most people walk right past the area without realizing a shrine is even there—and honestly? That’s part of why it still feels special.

    If you’re here for crowds, souvenir shops, and perfectly curated Instagram queues, this is not your shrine.

    But if you want calm, discovery, and that very specific “wait… how is this place not more famous?” feeling—welcome. You’re exactly where you should be.

    What Is Sasuke Inari Shrine? (And Why It’s Different)

    At its core, Sasuke Inari Shrine is a small Shinto shrine dedicated to Inari, the deity associated with prosperity, protection, business success, and good fortune. If you’ve been to other Inari shrines in Japan, you’ll recognize the fox statues—Inari’s messengers—guarding the grounds.

    But here’s the difference.

    Sasuke Inari Shrine Kamakura doesn’t feel ceremonial or grand.
    It feels personal.

    Instead of sitting in the open or near a major road, the shrine is tucked into a quiet valley behind residential neighborhoods, wrapped in trees and hills. There’s no city noise, no train sounds, no constant chatter. You mostly hear wind through the leaves, distant footsteps, and your own thoughts catching up to you.

    It doesn’t feel like a shrine designed to impress crowds.
    It feels like a shrine meant for people who actually made the effort to get there.

    [tp_widget][/tp_widget]

    Getting There: The Walk Is Part of the Experience

    Getting to Sasuke Inari Shrine Kamakura is not a straight shot—and that’s intentional.

    Path on West Exit Kamakura

    You don’t step off a train and immediately see torii gates. Instead, you walk through quiet streets, pass local homes, and slowly make your way toward a narrow forest path that feels almost too subtle to be real.

    For first-timers, this part can feel a little unsettling (in a good way):

    • The path isn’t obvious
    • Signage is minimal
    • You will probably check your map more than once
    • You might wonder if you missed a turn

    That’s normal. Everyone does.

    And then—almost suddenly—you’ll spot the first red torii gate peeking through the trees. That’s when it clicks. You didn’t get lost. You unlocked it.

    What You’ll See Inside Sasuke Inari Shrine Kamakura

    The grounds of Sasuke Inari Shrine aren’t huge, but they’re layered in a way that encourages wandering instead of rushing.

    Sasuke Inari Shrine

    Instead of one dramatic focal point, the shrine reveals itself slowly:

    • Moss-covered stone steps that feel worn in the best way
    • Clusters of red torii gates that appear, disappear, then reappear
    • Fox statues quietly guarding corners and altars
    • Tiny sub-shrines scattered around the hillside

    There’s no clearly marked route telling you where to go first or what’s “most important.” You explore at your own pace. You stop when something catches your eye. You move when it feels right.

    That lack of structure is exactly what makes the experience memorable.
    It feels unscripted. Almost private.

    Sasuke Inari Shrine Entrance Fee (Yes, It’s Free)

    Here’s some good news that never gets old:

    Sasuke Inari Shrine entrance fee: ¥0

    No ticket booths. No gates. No timed entry slots. Just open access.

    But free doesn’t mean careless. Visiting comes with unspoken rules:

    • Keep noise to a minimum
    • Respect the space and other visitors
    • Don’t treat it like a photoshoot set
    • Leave it exactly—or better—than you found it

    This shrine runs on reverence, not revenue. So I suggest that when you visit the shrine make sure to buy and offer to the shrine the kitsunes available on site. You might just have your wish come true.

    Best Time to Visit Sasuke Inari Shrine Kamakura

    Timing makes a huge difference here.

    The best time to visit Sasuke Inari Shrine Kamakura is:

    • Early morning (for calm and soft light)
    • Late afternoon (for mood and atmosphere)
    • Weekdays (for fewer people overall)

    This shrine shines when it’s quiet. Morning visits feel almost meditative, with light filtering through the trees. Late afternoons feel cinematic, like you’ve stepped into a scene instead of a destination.

    One note: avoid rainy days unless you’re confident on uneven paths. The trail can get slippery, and this is not a place you want to rush through.

    Sasuke Inari Shrine for First-Timers: What to Know Before You Go

    If this is your first visit, a little preparation goes a long way.

    Helpful tips:

    • Wear proper shoes (this is not a sandals-only stop)
    • Bring water, especially in warmer months
    • Expect uneven steps and forest paths
    • Give yourself permission to slow down

    Most visitors spend 30–60 minutes here, depending on how much they explore and how long they linger. This isn’t a “check it off the list” shrine. It’s a “let it unfold” kind of place.

    Why Sasuke Inari Shrine Is Perfect for Digital Nomads

    For digital nomads, Sasuke Inari Shrine Kamakura hits on a different level. Now going here isn’t about Wi-Fi, outlets, or café hopping. It’s about mental space.

    A Reset Spot, Not a Productivity Zone

    This shrine is best visited on:

    • Light workdays
    • Reflection days
    • Creative reset afternoons

    Go in the morning, clear your head, then return to work feeling grounded instead of overstimulated. It’s a surprisingly effective way to rebalance after days of screens and deadlines.

    Ideal for Slow Travel

    Sasuke Inari fits perfectly into a slow-travel lifestyle:

    • No rush
    • No schedules
    • No pressure to maximize

    It’s a reminder that travel doesn’t always need to be optimized. Sometimes, it just needs to be felt.

    Pairing Sasuke Inari Shrine With Other Kamakura Stops

    Because it’s tucked away, Sasuke Inari Shrine Kamakura works best when paired with quieter or reflective stops, such as:

    • Kotoku-in (Great Buddha) for contrast
    • Goryo Shrine for another calm, local-feeling visit
    • Residential walks through Kamakura’s backstreets

    Think of Sasuke Inari as your grounding point in a day that might otherwise include busier, more popular attractions.


    You might want to read:

    Why You Rarely See Sasuke Inari Shrine in Other Kamakura Guides

    Here’s the honest reason: It’s harder to explain.

    This shrine doesn’t offer one viral photo angle. It doesn’t have a single iconic moment. It doesn’t market itself.

    But for travelers who care about atmosphere, discovery, and those in-between moments, Sasuke Inari Shrine Kamakura often becomes one of the most memorable places they visit.

    Wrap Up: Sasuke Inari Shrine Is a Side Quest Worth Taking

    If Kamakura is the main storyline, Sasuke Inari Shrine is the side quest that unexpectedly stays with you long after the trip ends.

    It’s quiet. It’s subtle. It’s deeply human.

    And if you’re willing to walk a little further and slow down a little more, Sasuke Inari Shrine Kamakura gives you something rare in modern travel:
    space to breathe.

    Not everything memorable needs to be loud.

  • All the 11 Shooting Locations of “Can This Love Be Translated” in Enoshima and Kamakura, Japan (Updated)

    **We’ve updated the locations to point you exactly at the locations they used and added a few other locations beyond episode 1**

    No, because let’s talk about how unhinged this was in the best possible way.

    I sat down to watch Can This Love Be Translated? like a normal, functioning adult. No expectations. No plans. Just vibes. And then Episode 1 happened.

    Not the whole series. Not a dramatic arc. Just the first episode.

    Somewhere between the opening scenes and the end credits, my brain quietly shifted from watching to scheming and screaming! You know the feeling. The kind where you’re still technically seated on the couch, but mentally you’re already outside, shoes on, phone in hand, zooming into Google Maps.

    That’s the energy this article is written in.

    And here’s the best part: this isn’t just a fan thing. It’s actually a fantastic day tour for anyone wanting to explore Enoshima and Kamakura, whether you’re a fan or just someone who loves a fun, light day out with sightseeing, local vibes, and cute photo ops.

    If you want to see other locations in Kamakura and Enoshima, check out our experiences below.


    You might want to read:

    I was excited about Kim Seon Ho getting into places I’ve also visited!

    Episode 1 of Can This Love Be Translated? said, “Cool, but what if we also made you want to leave your house?”

    The Kamakura–Enoshima scenes on episode 1 don’t demand attention. They’re not flashy. They don’t scream tourism board. They just exist naturally in the story—which is exactly why they work.

    Your brain registers them quietly at first. The background feels calm. Walkable. Real. Then, a few scenes later, you realize something dangerous: none of this feels impossible to visit.

    That’s when the internal dialogue starts: That train shot feels specific.
    That crossing looks familiar.
    That angle doesn’t look like a set at all.

    And suddenly, the episode stops being passive entertainment. It becomes an invitation.

    [tp_widget][/tp_widget]

    Didn’t Plan to Find the Filming Places in Japan (But Curiosity Won)

    Let’s be clear—I didn’t start this with a master plan.

    It began as casual curiosity. A pause here. A rewind there. A screenshot saved “just in case.” Then the screenshots started piling up.

    I compared angles. Looked at fences, street layouts, train tracks. We did the very universal, very human thing of saying, “Okay but what if we actually tried to find this?”

    That’s when it crossed the line from curiosity to mission.

    Finding the Episode 1 spots didn’t feel like detective work—it felt like a game. One where the reward wasn’t proof, but recognition. That split second when you stand somewhere and your brain goes, Oh. This is it.

    And yes—we found them.

    We’ve been to Kamakura and Enoshima a couple of times before and well that was the trigger of the great flood of adrenaline when we saw familiar places! We might write a few other place around Enoshima and Kamakura in upcoming articles, but for now here we go with the shooting locations!

    Shooting Locations of “Can This Love Be Translated”

    I’ll include my recommended order of visiting them on the latter part of this article to make sure you’ll get a good use of your pass while checking out these places. But here they are:

    1. Gokurakuji Station

    Scene from Can This Love Be Translated Station

    This was the scene where Ho-jin got his pamphlets in different languages and mentioned to the staff that they seem to have run out of Korean ones.

    This is Gokurakuji Station which is one of the stop overs when you take the Enoden Line.

    2. Street Near Minshuku Ryokan Shigesuke/ Tenzan Lab

    Restaurant Scene location from Can This Love Be Translated

    Now you might not find this cafe on Google Map, but this one’s on Tabelog (the food app used by Japan locals).

    To find this street on Google Map just type: Minshuku Ryokan Shigesuke

    Not sure if the restaurant on the series is a real one (the one with the blue curtain on the left shot is Tenzan Lab but is currently on the map as temporarily closed) but it would be quite an experience to get on this back alley where they shot a number of frames!

    Now getting here is straightforward if you’re using Google Maps, but to be honest this is quite a long walk from the stations (whether you took the Enoden Line or the Shonan Monorail).

    If you don’t plan on taking the trains, I suggest that you take the N3 bus from Ofuna (just outside Ofuna Bus Station) since you’ll be dropped off just a few minutes from this street.

    3. A bird’s eye view from Enoshima Shrine Hetsumiya

    Bird's eye view from Can THis Love Be translated

    On weekends and holidays, there is great foot traffic towards this shrine. I think the least crowded time we’ve visited before was a weekday mid February. If you’ve seen this view and it’s likely that you’ve seen the busy alley going here.

    I remember the first time we went here, we were so discouraged because we saw the flight of steps going to the shrine, not knowing that there was an easier way going there (although still a flight of stairs, but less steep and had more shops and views).

    4. Asahi Honten (near Yuhi Chaya, not on Enoshima Benzaiten Shopping Street)

    Scene from Can This Love Be Translated After the Confrontation
    Asahi Honten

    Well after the restaurant confrontation and the donning of the “universal language” this scene comes next where they parted ways.

    This one is at Asahi Honten where you can get some snacks. There is also a small space there where there are occasional street performances. Now going here means you’ve taken the stairs, or the elevator to the Enoshima Candle!

    When you put this on Google Map you may find that it also points to another Asahi Honten (at the lower area) but if you really want to find this area you can also type “Yuhi Chaya”. I confirmed this because when you rewatch the series you may find a signage on the background of Mu Hee saying “Two Mountains” and this Asahi Honten is very much a few steps away from that area, unlike the one at the shopping street.

    You might appreciate the snack shops along the way because, when I say stairs, it really has a lot of it!

    5. Goryo Shrine

    Scene from Can This Love Be Translated where they walked together after the call

    Well after parting ways, Mu Hee realized that she took Ho-jin’s phone and the scene before they walked together was filmed at Goryo Shrine (no longer at Enoshima, but along Enoden Line).

    This one is also near the Hasedera Temple which you can visit if you’re taking your time (trust me you can’t do the Hasedera temple on the same day if you want to visit all the shooting locations).

    6. Katase Bridge

    Scene where Shin Ji Seon was on a tour to Enoshima on her birthday

    This scene where Shin Ji Seon was part of the tour group can be easily reenacted when you walk along Katase Bridge.

    7. Nakamuraya Honten Teahouse

    Scene from Can This Love Be Translated where Mu Hee showed him that he can search her on the internet

    This was the scene where they seem to be a souvenir shop then she mentioned to Ho Jin that he can search for her on the internet (since she’s an actress).

    Despite what you may read from other articles this is not at Enoshima Benzaiten Shopping Street, this location is actually at Nakamuraya Honten House which you may find when you explore the area furhter up from the Enoshima Candle area.

    8. 片瀬漁港白灯台 or Katase Fishing Port White Lighthouse

    Now you might be looking forward to this one since it has the Mt. Fuji view and the Enoshima view in one place.

    You might need to use the Japanese location name to find it on Google Map

    Scene with Mt. Fuji and Enoshima Island

    It took me a while to finally pinpoint this one, but the hidden clue was that white lighthouse on their background!

    Not sure there really are benches there now (could be props) but this is exactly that spot. There’s one thing though, don’t get too hopeful there would be a big Mt. Fuji view from here, that’s just a result of their good cameras and angles.

    9. Tanaka Barbershop

    Scene before they parted ways
    Scene before the train came between them

    This one is just a few minutes walk away from Goryo Shrine. Imagine reenacting the dramatic parting with the train between them!

    10. Enoshima Candle

    When Ho Jin stopped himself from seeing Ji Seon
    Enoshima Candle

    Would’t it be nice to be Jin Seon waiting for Ho Jin at night? Now Enoshima Candle has an entrance fee which I’ll be discussing below.

    Enoshima Sea Candle & Samuel Cocking Garden Tickets

    If you’re planning to visit Enoshima Sea Candle, it’s good to know how tickets and fees work, especially if you want to combine it with other spots on the island like Samuel Cocking Garden and Enoshima Escar.

    Enoshima Samuel Cocking Garden is free to enter during the day if no events are happening. However, if you visit after 5:00 PM during an event, there is a fee:

    • Adults: ¥500
    • Children: ¥250

    Enoshima Sea Candle, which is inside the garden, always requires an admission fee:

    • Adults: ¥800
    • Children: ¥400

    There are discounted rates for groups (20+ people) and for visitors with disability certificates, which you can confirm at the reception desk.

    Set Tickets & Online Options

    For convenience and savings, consider these great value tickets, especially if you want to explore multiple attractions:

    • Enoshima Sea Candle Set Ticket: includes Escar + Cocking Garden + Sea Candle. Adults: ¥1,100 / Children: ¥550.
    • Enoshima 1-Day Ticket: covers Escar + Cocking Garden + Sea Candle + Iwaya Cave. Adults: ¥1,550 / Children: ¥700.
    • Enoshima Iwaya Sea Candle Set Ticket: Cocking Garden + Sea Candle + Iwaya Cave. Adults: ¥1,110 / Children: ¥500.

    💡 Pro Tip: If visiting after 5:00 PM during an event, make sure to get the “+Night” ticket which includes the evening event fee.

    Where to Buy Tickets

    • On-site: Tickets are available at each facility entrance (Cocking Garden, Sea Candle, Escar platforms) and at local tourist information centers. Payment options include cash, credit cards, transportation IC cards, and PayPay.
    • Online: Recommended to skip the line! Platforms like Asoview or EMot sell the Sea Candle Set Ticket, Enoshima 1-Day, and Area Passport tickets.

    11. Cape Inagasaki (This was on Episode 2!)

    This was the place where Ho-jin and Jin-Seon parted ways and where she gave him an “omamori” telling him that if they see each other again then they are meant to be together.

    Why Visiting the Locations Will Be Low Effort but High Satisfaction

    This wouldn’t be a pilgrimage where you’re racing against time or bouncing between far-flung locations. Everything flows naturally. You walk. You pause. You ride a train. You walk some more.

    The excitement comes in waves, not all at once. You’ll be chatting, half-distracted, and then suddenly someone stops mid-sentence because something in the corner of their eye clicks.

    That moment—when recognition hits—is pure serotonin.

    Even if you miss an exact angle or realize the spot is one street over, it doesn’t ruin anything. It adds to it. The day becomes about discovery, not precision.

    This makes it an absolutely perfect day tour for anyone wanting to explore Enoshima and Kamakura, not just fans of the series. Scenic streets, cozy cafes, ocean views, and just enough adventure to make you feel like the main character.

    Suggested Order of Visiting (from Kamakura)

    1. Tanaka Barbershop ( near Hase Station)

    2. Goryo Shrine (3 minutes walk from Tanaka Barbershop)

    3. Gokurakuji Station

    4. 片瀬漁港白灯台 or Katase Fishing Port White Lighthouse

    5. Katase Bridge

    6. Street Near Enoshima 155 Cafe

    7. Enoshima Shrine Hetsumiya

    8. Nakamuraya Honten Teahouse

    9. Asahi Honten

    10. Enoshima Candle (at night)

    Other places you can visit/checkout while on the day tour:

    1. Yama-Futatsu (Twin Mounts) – this one is a few steps away from Nakamuraya Honten Teahouse

    2. Iwaya Caves – I would only add Iwaya caves if you’re spending a full day at Enoshima. But if you want to add Iwaya Caves on your day tour, make sure you’re done with Katase Fishing Port white lighthouse by lunch and ready for long walks and mountains of stairs.

    You have to take the ferry at (Enoshima Ferryboat “Bentenmaru” Benten Bridge Pier). This is a long walk (with lots and lots of stairs going to Nakamuraya Honten Teahouse and Asahi Honten then you can go to the Enoshima Candle, Enoshima Shrine Hetsumiya and Street Near Enoshima 155 Cafe.)

    Enoden 1-Day Pass “Noriorikun”: Your Key to the Adventure

    Now, let’s talk about the Enoden 1-Day Pass, also known as “Noriorikun.”

    Here’s the deal: if you want to fully own your Enoshima–Kamakura day trip, the Noriorikun 1-Day Pass is your new best friend. Think of it like the golden ticket that lets you ride the Enoden train as much as you want, all day long—hop on, hop off, explore, snack, repeat. It’s basically a “freedom in a ticket” kind of vibe.

    But wait, it doesn’t stop at just unlimited train rides. With Noriorikun, you get a little bonus magic sprinkled into your day. Loads of local spots along the line—like Enoshima Sea Candle, Enoshima Aquarium, Hasedera Temple, and even restaurants or small lodging spots—offer special discounts or perks just for pass holders. Imagine riding the train, stopping wherever you feel like, and getting tiny little wins along the way. Instant dopamine.

    The passes are ridiculously easy to grab: 800 yen for adults, 400 yen for kids, available at all Enoden station vending machines. Super straightforward, no fuss. Just make sure you use it on the day of issue because it doesn’t roll over, and yes, it’s one ticket, one day, unlimited exploration.

    Basically, if your goal is to make your Kamakura–Enoshima pilgrimage effortless, flexible, and fun, Noriorikun is the ticket that makes it happen. No schedules, no stress, just pure wanderlust energy.

    It’s also a great deal for its price especially when you plan to visit all the shooting locations and going back!

    In short: Noriorikun can turn your casual day out into a fully optimized, hop-on-hop-off adventure, complete with fun discounts and the freedom to explore everything at your own pace.

    Final Thoughts: Don’t Overplan, Just Go

    This is not a pilgrimage that rewards overthinking.

    Watch Episode 1. Let it sink in. Screenshot the scenes that stick with you. Grab the Enoden 1-Day Pass. Wander.

    You don’t need to catch everything. You don’t need to be exact. Can This Love Be Translated? didn’t demand your attention—it earned it.

    And somehow, that first episode did the same with your feet.

    Honestly?

    That’s kind of iconic.

    And if you just want a fun, light, full-day trip exploring Enoshima and Kamakura while feeling like you’re part of a drama, this is it.

  • Where is Lucena City located?

    Lucena, the capital city of the province of Quezon, Philippines, is a vibrant and bustling destination that offers a mix of urban amenities, cultural heritage, and natural beauty. The city serves as a commercial center and transportation hub in the region. Visitors can explore the lively public market, where local produce, crafts, and delicacies are sold.

    Why Choose Lucena City as Your Launchpad

    When I first decided to explore Southern Luzon, I didn’t expect Lucena City to become one of my favorite stops. Nestled in Quezon Province, it’s the perfect mix of city buzz, local culture, and natural beauty. I love cities that feel alive but still let you breathe—and Lucena does exactly that.

    For a first-time traveler or a digital nomad, it’s ideal because it’s a central hub: you can explore the city itself, hit nearby beaches, or take day trips to Laguna and even Bicol.

    • Where to Eat in Lucena
    • What to Do and Tourist Spots in Lucena
    • Best Time to Visit Lucena

    Where is Lucena City?

    Lucena features historical landmarks, including the Saint Ferdinand Cathedral and the Rizal Monument. It also serves as a gateway to the nearby Mount Banahaw and Mount Cristobal, which are popular destinations for hikers and spiritual seekers.

    Lucena’s central location within the province and its vibrant cityscape make it a convenient and lively base for exploring the wonders of Quezon.

    The city’s dining scene is a delightful fusion of flavors, with a wide range of restaurants offering local dishes and international cuisine. Lucena offers a dynamic urban experience while preserving its cultural roots and natural surroundings.

    Lucena is a city located in the province of Quezon, Philippines. Situated on the southeastern part of Luzon Island, Lucena serves as the provincial capital of Quezon.

    The city offers a mix of urban amenities and natural attractions. Lucena features historical landmarks, including the Saint Ferdinand Cathedral and the Rizal Monument.

    It also serves as a gateway to the nearby Mount Banahaw and Mount Cristobal, which are popular destinations for hikers and spiritual seekers. Lucena’s central location within the province and its vibrant cityscape make it a convenient and lively base for exploring the wonders of Quezon.

    Getting There: Manila to Lucena City

    The trip from Manila to Lucena City is easy, but it’s worth planning a bit. You can take a bus from Cubao, and it will be a 3–4 hour ride, depending on traffic. Another option is driving via SLEX and the Pan-Philippine Highway—about 2–3 hours.

    Here’s what I learned:

    • Bring snacks and water for the bus.
    • There’s a quick stop along the way for bathroom breaks, but if you’re someone who can’t “hold it,” let’s just say… it’s better to prepare mentally or bring a backup solution. First-timers, don’t underestimate this.
    • A travel pillow goes a long way—especially if you’re planning to catch up on work or rest before exploring Lucena.

    Where To Go from Lucena

    1. Explore Quezon Province

    Lucena is your launchpad for some of Quezon’s most stunning attractions:

    • Cagbalete Island (Mauban): Imagine soft white sand and crystal-clear water. Just a two-hour ride from Lucena, this island paradise is great for those looking for peace and beauty.
    • Pagbilao and Kuwebang Lampas: This spot is just 30 minutes away from Lucena. You’ll find a hidden gem with white sand beaches and a cave to explore. In our experience this was included in the boat tour from Borawan.
    • Tayabas: A short 20-minute trip from Lucena takes you to Tayabas, home to historic churches like the Minor Basilica of St. Michael the Archangel and local favorites like lambanog (coconut wine).

    2. Venture to Laguna

    Lucena also provides quick access to some of Laguna’s must-visit destinations:

    • Pagsanjan Falls: Looking for adventure? A short trip north takes you to Pagsanjan, where you can enjoy a thrilling boat ride to one of the Philippines’ most famous waterfalls.
    • Mount Banahaw: If you’re up for hiking or looking for spiritual retreats, this mystical mountain on the Quezon-Laguna border is a favorite among outdoor enthusiasts and pilgrims.
    • Hot Springs in Los Baños
      After all the traveling, you can relax in the natural hot springs of Los Baños, which is just over an hour from Lucena.

    3. Head Further South to Bicol

    For those journeying to Bicol, Lucena is a key transit point. From here, you can catch a bus to the region’s top attractions:

    • Mayon Volcano (Albay): A 6- to 8-hour ride from Lucena will take you to this iconic, perfectly cone-shaped volcano.
    • Caramoan Islands (Camarines Sur): These islands are a paradise for adventurers, with dramatic cliffs, turquoise waters, and hidden beaches.
    • Whale Shark Watching in Donsol (Sorsogon): If you’ve ever dreamed of swimming with whale sharks, you’ll find this unforgettable experience after a bus ride from Lucena.

    Exploring Lucena City

    Once I arrived, Lucena surprised me. From the Saint Ferdinand Cathedral to the Rizal Monument, there’s plenty of culture to soak up. I wandered through the public market, tasting local treats and admiring handmade crafts.

    Food highlights:

    • Pancit habhab, a noodle dish served on banana leaves
    • Budin, Quezon’s famous cassava cake
    • Local coffee shops to catch up on work if you’re a remote worker

    Getting around is simple—tricycles or rented motorcycles are perfect for hitting landmarks and grabbing lunch without worrying about parking.

    What Lucena Has To Offer

    Before heading off to your next destination, why not take some time to enjoy Lucena itself?

    • Taste the Local Flavors: You can’t leave Lucena without trying pancit habhab, a noodle dish served on banana leaves. Pair it with freshly baked budin (cassava cake) for a complete Quezon food experience.
    • Join the Festivities: Visit in May to catch the Pasayahan sa Lucena Festival, a lively event filled with parades, street parties, and colorful costumes.
    • Shop for Souvenirs: From local delicacies to handmade crafts, Lucena’s markets and shops are full of great finds.

    Getting Around Lucena

    Tricycles or rented motorcycles

    Itinerary Sample

    Best 3 Day Itinerary

    Day 1: Get a solemn visit to Kamay ni Hesus.
    Day 2: Visit Tayabas Basilica and Kamayan sa Palaisdaan Floating Restaurant.
    Day 3: Discover the Villa Escudero Plantation and relax at Cotta Beach.

    Alternative Itinerary
    Day 1: Visit Villa Escudero Plantation and Cotta Beach.
    Day 2: Explore Kamay ni Hesus and Tayabas Basilica.
    Day 3: Discover Quezon Capitol Park and the Quezon National Forest Park.

    The city’s distinct character is showcased through its annual MassKara Festival, a vibrant celebration of music, dance, and colorful masks. Bacolod is a food lover’s paradise, offering a wide array of delectable dishes, including the iconic chicken inasal, a grilled chicken marinated in a unique blend of spices.

    Lucena invites visitors to embrace the vibrancy of its urban landscape, immerse themselves in its cultural heritage, and discover the natural wonders that surround the city.

    Whether you’re exploring the bustling markets, admiring the historical landmarks, or indulging in the diverse culinary offerings, Lucena provides a captivating blend of urban excitement and cultural charm. Plan your visit to Lucena and let the city’s energy, history, and natural beauty ignite your senses and create memories that will stay with you long after your journey ends.

    Beaches Near Lucena Quezon

    Beaches Near Quezon Province


    1. Cagbalete Island (Mauban, Quezon)

    Imagine white sand beaches and clear blue waters—Cagbalete is perfect for that tropical getaway!

    How to get there:

    1. Hop on a bus from Manila to Lucena City (about 3–4 hours).
    2. At the Lucena Grand Terminal, transfer to a van or jeepney heading to Mauban (around 1.5 hours).
    3. Once in Mauban, head to the port and catch a boat to Cagbalete Island (a fun 45-minute ride).

    2. Kuwebang Lampas / Puting Buhangin Beach (Pagbilao, Quezon)

    Kwebang Lampas

    Looking for a beach with soft white sand and a cave to explore? This is the spot!

    In our experience Kwebang Lampas was included in the boat tour from Borawan.

    How to get there:

    From Manila, ride a bus to Lucena City (3–4 hours).

    From Lucena Grand Terminal, take a jeepney or van to Pagbilao town (just 30 minutes).

    Hire a tricycle to Barangay Ibabang Polo, then take a short boat ride to the beach (20–30 minutes)..


    3. Borawan Beach (Padre Burgos, Quezon)

    Borawan Island Resort

    It’s like Boracay and Palawan had a love child! This beach has unique rock formations and soft sand.

    Hire a boat from the port to Borawan Beach (15–20 minutes) or if you have a car take the land route (make sure to dedicate a phone for this) since signal is spotty about 45 minutes going to the Borawan Island Resort by Cocotel.

    How to get there:

    Take a bus from Manila to Lucena City (3–4 hours).

    From Lucena Grand Terminal, catch a van or jeepney heading to Padre Burgos (about 1 hour).

    As for our experience we went there by car and following Waze/ google Maps in the direction of “Borawan Island Resort. Don’t be scared if you feel like it’s the middle of nowhere suddenly because you’re in between mountains and fields.

    Haha we literally had that feeling driving there for the first time (yep we went there a couple of times right after that). Also don’t miss their entrance it’s a nice shock to be in between trees then be greeted by the sea at the end of the tree tunnel.

    There’s an option to get a room and or to camp in there. Also, food is usually ordered for cooking there which saves you the hassle of thinking of what to bring. As far as I remember, there was one villa that time who brought their own food there (mostly grilled).


    4. Dampalitan Island (Padre Burgos, Quezon)

    Want to camp by the beach? This island offers a laid-back vibe and a rustic experience.

    How to get there:

    1. Follow the same steps as Borawan Beach.
    2. From Padre Burgos, hire a boat to Dampalitan Island (just 15–20 minutes away).

    5. Jomalig Island

    Golden sands, peaceful vibes, and a long boat ride—it’s an adventure worth taking!

    How to get there:

    1. From Manila, take a bus to Real, Quezon (3–4 hours).
    2. From Real Port, hop on a boat to Jomalig Island (this can take 4–6 hours, so bring snacks and enjoy the ride!).

    • Boats usually leave early in the morning, so plan ahead!

    6. Puting Buhangin Beach (Pagbilao Grande Island)

    Crystal-clear water and soft white sand—what’s not to love?

    How to get there:

    1. Ride a bus from Manila to Lucena City (3–4 hours).
    2. From Lucena, take a jeepney to Pagbilao town (30 minutes).
    3. Hire a tricycle to Barangay Ibabang Polo, then take a short boat ride to the beach.

    Quick Travel Tips for Manila to Quezon Beaches:

    • Buses to Lucena City: Head to bus terminals in Cubao, Buendia, or Pasay. Reliable options include JAC Liner, DLTB, and Lucena Lines.
    • Travel Time: It’s about 3–4 hours to Lucena. If you’re island-hopping, add extra time for transfers and boat rides.
    • Bring the Essentials: Don’t forget sunscreen, water, snacks, and cash (some areas don’t have ATMs).
    • Boat Schedules: If you’re going to islands like Jomalig or Cagbalete, check the boat schedules—they often leave early in the morning.

    If you’re a beachgoer looking to explore Quezon’s famous islands, a nature lover headed to Laguna’s serene mountains, or a traveler venturing to Bicol’s volcanic wonders, Lucena provides seamless access to these destinations.

    Lucena City isn’t just a stop—it’s your launchpad to endless adventures!

    From Quezon’s dreamy islands to Laguna’s relaxing hot springs and Bicol’s jaw-dropping volcanoes, Lucena is your ticket to exploring the best of Southern Luzon.

    So, pack your bags, grab your snacks, and get ready to dive into the fun. Because when it comes to discovering the south, all roads (and good vibes) lead to Lucena!

    For first-timers, it’s manageable and exciting. For digital nomads, it offers quiet cafes, inspiring scenery, and a chance to disconnect while still being well-connected.

    Whether you’re island-hopping in Quezon, hiking in Laguna, or chasing volcano views in Bicol, Lucena makes every journey easier and more memorable. Pack your bags, bring your curiosity, and let Lucena show you the best of Southern Luzon!

  • Food Trip in Iloilo? We Got You a Map Too!

    We went back twice to have a food trip in Iloilo so we can cover in this food trip guide the most recommended places and pasalubong ideas!

    Now for every food trip guide that we write we make sure to cover the locally recommended places (not the tourist-hyped ones) and create a full recap of the best ones that are homegrown brands that is worth the buck!

    Are you ready?

    *Prices on the linked articles are based on the prices at the time the article was written. Price and availability of the food items are subject to change without notice.

    We made a simple map for your Iloilo food trip escapade at the end of the article.

    Dafalong’s Garden Cafe

    Now, we started our recommendation list with Dafalong’s Garden Cafe since it’s quite far from Iloilo City but is best visited after your Gigantes Islands Tour.

    Check out our full review of their Chicken Inasal and Chorizo Pasta on the highlighted links below:

    Apart from their mouth-watering dishes, Dafalong’s Garden Cafe also has a very scenic garden where you can take lots of pictures and relax to your heart’s content.

    While this stop over may not be included in your tour packages, do ask ahead and let your tour operator know if you want to visit this place since it’s still along the main road when going back to Iloilo City.

    As for us, we were able to visit this place since we rented out a car and just drove back and forth to Carles Port for the Gigantes tour. If you’re driving too, make sure to choose Dafalong’s Garden Cafe tagged in San Dionisio, Iloilo (or check out the last part of the food reviews below for the Waze/Google Map options).

    See full article of the Pecho Inasal here

    See full article of Chorizo Pasta here

    Bugoy’s Seafood Resto

    Bugoy’s is a good 15-30 minutes drive from the city area and don’t get discouraged if you find that you can only park on the roadside to visit it!

    We discovered this place since we noticed how there was always a line of cars and people flocking on the place even when there isn’t a parking area inside it. That was a great sign for us that it was likely that people go there for the food too!

    And we were not disappointed! Food servings were good for 2-3 people and such a steal for their prices!

    We loved how it was so kid-friendly and had an indoor playground for the little ones. Plus they had a covered deck area where you can enjoy the view of Guimaras on the horizon.

    They are also partnered with Kumedor Grind and on the deck is their quaint bar for your cocktails and other drink options!

    Check our review of our recommended food and its price from Bugoy’s on the highlighted links below:

    See full article of their Buttered Garlic Shrimp →

    See full article of their Buttered Chicken →

    Muelle Deli and Restaurant

    Check out Muelle Deli and Restaurant if you want an upscale dining experience beside the glorious Iloilo River Esplanade that’s very clean and calming to visit any time of the day.

    While their dishes may rack up a bit on your wallets, they make sure that their service and the taste quality of their food is up to par with your expectations. You may find that people flock this place during dinner and during especial occasions.

    The outdoor area is also pet friendly!

    Check our review of their food that we liked best and its price on the highlighted links below:

    See full article of this Honey Spicy Shrimp →

    See full article of their Calamansi Creme Brulee →

    [tp_widget][/tp_widget]

    JD Bakery Cafe

    JD Bakery Cafe is a homegrown brand patronized for their pastries and bread and it’s such a great thing that they offer rice meals too!

    We loved how their rice meals were so affordable and very filling given that we discovered this local cafe inside the mall.

    See full article of their Longganiza, Egg and Garlic Rice

    See full review of their Fried Chicken Meal

    Troi Oi

    Troi oi offers Vietnamese cuisine menu that will make you feel like you need to come back to Iloilo again soon!

    We super loved their Boness Chicken Thighs and their Stir Fried Noodles with their special fish sauce that goes very well with it!

    Did we come back here on our second Iloilo trip? YES!

    You’ll love their cozy interiors, and they have great live music during the evening!

    See full article for their Stir Fried Noodles

    See full article for their Boneless Chicken Thigh

    Punot Restaurant

    Punot is usually crowded that we needed to have a reservation a day ahead to make sure we got a seat for our dinner.

    Punot offers modern twists and takes on typical Iloilo specials that even the locals stay loyal to this homegrown food stop.

    They offer big servings (for just the right price) perfect for groups and getting together with friends visiting Iloilo!

    See full article for Fried Tanglad Soy Chicken→

    See full article for Tres Mangga Salad

    Tatoy’s Manokan and Seafood

    You’ll typically find Tatoy’s as one of the most mentioned and recommend food stop in Iloilo. While we did try most of the items that people have recommended on blogs we find that their Baked Talaba is the best for its price and quality.

    While we also tried their chicken that most bloggers seemed to recommend, we found it a bit too small for its price.

    So while it did taste alright, and as you know, Lasang Uulit usually just features the most worth the buck options, the baked talaba rose as the most worthy of mentioning here 😀

    Roberto’s

    Of course, we didn’t pass up the chance to try the very famous Roberto’s Siopao. And yes it was truly worth the wait and spend.

    Remember that Roberto’s is closed during Sundays (that was our mistake when we went to Iloilo the first time), so make sure to schedule your visit to this one!

    Best Pasalubong Places

    Don’t forget to get pasalubongs when you have your food trip in Iloilo! Here are the well known and loved brands that visitors and locals patonize.

    Rgies Delicacies

    We super duper love Rgies! And while you may find it hard to find in most malls around Iloilo, you can find these inside Iloilo airport (the pasalubong booths before going inside the departure area).

    You can also order from their website online and have it delivered to your accommodations as long as they are within Iloilo City.

    You may also find them on Shopee and Lazada, but make sure that you’re ordering from their official store (links can be found on the articles below).

    See full article for Butterscotti→

    See full article for Butterscotch Squares (Mango Bits) →

    Original Biscocho Haus

    Biscocho is the most well-known pasalubong when you mention Iloilo and Original Biscocho Haus stands as one of the pioneers of this well-loved treat.

    See full article for Biscocho from Original Biscocho Haus

    Bongbong’s Piaya and Barquillos

    Piaya is another favorite pasalubong whenever you mention places in the province of Negros.

    You can order thru their website and their official Shopee account (links on the article below) since they have mentioned that they will not be liable for goods that are not bought from their official chanels.

    See full article for Ube Piaya from Bongbong’s

    Food Trip in Iloilo Guide Map

    Below is the map that you can use as reference when you want to find these hidden but truly worth it gems in Iloilo!

    Now you’re ready for that ultimate food trip in Iloilo!

  • Best Time to Visit Iloilo City, Iloilo and Things To Do On Your Trip

    Iloilo, a province in the Philippines with a rich cultural heritage and natural beauty, welcomes visitors throughout the year. However, the best time to visit Iloilo is during the Dinagyang Festival, which takes place in January.

    This vibrant festival is a celebration of Santo Niño, showcasing colorful parades, street dances, and cultural performances. It’s an excellent opportunity to immerse yourself in Iloilo’s lively culture and traditions.

    Outside the festival season, Iloilo offers a range of attractions and activities. Visit the iconic Jaro Cathedral, one of the oldest churches in the Philippines, and see the statue of Our Lady of the Candles.

    Why Iloilo is Worth Visiting Any Time of the Year

    Honestly, I almost didn’t realize how much this province had to offer until I spent a few days exploring it. And wow—there’s something for everyone:

    • History & Culture: From the majestic Jaro Cathedral to the intricate Spanish-era churches like Miagao and Molo, every corner tells a story. Even just walking through Calle Real, the historic downtown, makes you feel like you’ve stepped back in time.
    • Nature & Adventure: Island-hopping in Guimaras, swimming in crystal-clear waters at Islas de Gigantes, or wandering around farms and waterfalls—Iloilo is basically a playground for nature lovers.
    • Food & Lifestyle: And let’s not forget the food. Seriously, the batchoy alone is worth booking a flight for. But we’ll get to that later.

    The best part? Iloilo isn’t overrun by tourists like Cebu or Boracay, so you get to enjoy the beauty at your own pace.

    What’s the weather like in Iloilo on your month of choice

    January:

    In January, Iloilo experiences a warm and sunny climate. The average temperature ranges from 24°C to 30°C (75°F to 86°F). The region is characterized by clear skies and minimal rainfall, making it an ideal time to explore the city and its surroundings. Visitors can enjoy outdoor activities, such as beach trips and island hopping, thanks to the pleasant weather. The coastal breeze provides a refreshing touch, making Iloilo an attractive destination for travelers seeking a tropical escape.

    February:

    February brings similar weather to Iloilo as in January, with warm temperatures ranging from 25°C to 31°C (77°F to 88°F). The days are generally sunny, making it perfect for engaging in various outdoor activities. Visitors can explore the vibrant festivals, such as the Dinagyang Festival, and witness the colorful parades and street dances. The city’s charming beaches, like Gigantes Island and Guimaras Island, offer a delightful getaway with calm waters and picturesque landscapes.

    March:

    In March, Iloilo experiences a transition to a hotter climate. The temperature rises to an average range of 26°C to 32°C (79°F to 90°F). While the weather remains generally sunny, occasional rain showers may occur. It is advisable to carry an umbrella or light rain gear for any unexpected downpours. Despite the heat, this month offers opportunities to explore Iloilo’s rich history by visiting landmarks like the Miagao Church and the historic downtown area known as Calle Real.

    April

    April marks the beginning of the summer season in Iloilo. The temperature ranges from 27°C to 33°C (81°F to 91°F), bringing hotter days. It is advisable to stay hydrated and wear appropriate sun protection while exploring the city. The occasional rain showers help cool down the atmosphere. April is an excellent time to savor Iloilo’s delectable cuisine and visit attractions like the Jaro Cathedral and the Museo Iloilo. The city’s vibrant street food scene is also worth exploring during this time.

    May

    May in Iloilo sees an increase in temperatures, ranging from 28°C to 34°C (82°F to 93°F). The weather remains generally sunny, but occasional thunderstorms can occur, providing relief from the heat. It is advisable to plan outdoor activities in the early morning or late afternoon to avoid the hottest hours of the day. May is an excellent month to explore the natural wonders of Iloilo, including the Islas de Gigantes, Garin Farm, and the captivating Guimbal Church.

    June

    June brings the onset of the rainy season in Iloilo. The average temperature ranges from 27°C to 33°C (81°F to 91°F). Expect occasional rain showers and cloudy skies throughout the month. It is recommended to carry an umbrella or raincoat when venturing outdoors. Despite the rain, there are still plenty of indoor activities to enjoy, such as visiting museums and art galleries. Food enthusiasts can indulge in Iloilo’s famous batchoy, a savory noodle soup that provides comfort during the wet weather.


    July

    July continues the rainy season in Iloilo, with temperatures ranging from 26°C to 32°C (79°F to 90°F). Frequent rain showers and cloudy skies are expected during this month. It is advisable to plan outdoor activities accordingly and carry appropriate rain gear. While the weather may be wet, visitors can explore Iloilo’s rich cultural heritage by visiting historical sites such as the Molo Church and the Casa Real de Iloilo. Art lovers can also appreciate the works of local artists in the city’s art galleries.

    August

    In August, Iloilo experiences similar weather conditions to July. The temperature ranges from 26°C to 32°C (79°F to 90°F), with occasional rain showers and cloudy skies. It is advisable to check the weather forecast before planning outdoor activities. However, the rain does not dampen the city’s lively spirit. Travelers can still immerse themselves in the vibrant festivals and indulge in Iloilo’s famous delicacies, such as fresh seafood and native dishes like batchoy and pancit molo.

    September

    September in Iloilo continues the rainy season, with temperatures ranging from 26°C to 31°C (79°F to 88°F). Rain showers and overcast skies are common during this month. It is recommended to carry an umbrella or raincoat when exploring the city.

    Despite the rain, September offers opportunities to witness local celebrations like the Pintados Festival in the town of Calinog. Visitors can also take part in eco-tourism activities in nearby natural attractions, including waterfalls and caves.


    Best Time to Visit Iloilo

    The best time to visit Iloilo is during the months of January to May when the weather is dry and festivals take place.

    Even if we are writing about the best time to visit Iloilo City, this is just an approximate range so always make sure to check weather conditions prior to your trip because typhoons can be unpredictable and may affect your destination .


    October

    In October, Iloilo experiences a transition from the rainy season to a drier period. The average temperature ranges from 25°C to 31°C (77°F to 88°F). While occasional rain showers may still occur, the weather becomes generally more pleasant, with a decrease in precipitation. This month presents an ideal time to explore the city’s cultural heritage, such as the Old City District and the ancestral houses found in the Jaro neighborhood. Travelers can also enjoy shopping and dining in Iloilo’s modern malls and restaurants.

    November

    November marks the beginning of the cooler months in Iloilo. The temperature ranges from 24°C to 30°C (75°F to 86°F), bringing a more comfortable climate. The weather is generally sunny with occasional rain showers. It is advisable to carry a light jacket or sweater for cooler evenings. November is a great time to explore Iloilo’s natural beauty, including the stunning Miagao Church and the enchanting Isla de Guimaras, known for its pristine beaches and mango orchards.

    December

    December in Iloilo is characterized by cooler temperatures ranging from 24°C to 30°C (75°F to 86°F). The weather remains pleasant and mostly sunny, making it an excellent time for outdoor activities. It is advisable to pack light clothing and sunscreen while exploring the city. December also brings the festive spirit to Iloilo, with colorful Christmas displays and parades. Visitors can experience the lively atmosphere by joining the celebrations and savoring traditional Filipino holiday delicacies.

    Best things to do on your visit to Iloilo

    Iloilo’s charm is in the mix—history, adventure, and food. Here’s what I absolutely loved:

    1. Miag-ao Church

    A UNESCO World Heritage Site and an architectural marvel. The stone carvings are insane! I spent a whole morning just snapping photos and imagining life during Spanish colonial times.

    2. Guimaras Island

    If you love beaches and mangoes, this is your paradise. I rented a bike to explore, tried fresh mango shakes at every corner, and even discovered a quiet beach where I was basically the only visitor.

    3. Jaro Cathedral

    It’s more than just a church—it’s a slice of Iloilo history. Plus, don’t miss the Our Lady of the Candles statue. I found it super peaceful, especially when I visited during sunset.

    4. Iloilo River Esplanade

    Perfect for evening strolls or just people-watching. There are street performers, art installations, and enough greenery to make you forget you’re in the middle of a city. Have I mentioned that there are a lot of gastro choice to check out there too?

    5. Food Trip

    Iloilo is a foodie’s dream. Don’t miss:

    • Batchoy (La Paz style)
    • Pancit Molo
    • Piaya and Napoleones
    • Fresh seafood at Villa Beach or Guimaras

    My advice: bring stretchy pants—you’ll need them.

    You can also check out our Food Trip Eat in Iloilo article for our first-hand recommendations.

    Hidden Gems You Might Not Know About (Me Too!)

    Iloilo isn’t just about beaches and churches—there are a lot of hidden gems scattered around the province. Now, full disclosure: I haven’t had the chance to visit all of these yet. On my trip, we mostly explored Iloilo City, Jaro, and Islas de Gigantes, but here are a few spots I’ve read about and hope to check out next time:

    Sicogon Island: I’ve seen photos of this quiet paradise, and it looks like the ultimate escape from crowds. Imagine soft sand, turquoise waters, and almost no tourists. Definitely on my bucket list for the next visit.

    Jaro Belfry: It sounds like the perfect spot for sunrise or sunset photos. It’s now tagged permanently closed, but I do remember seeing that in front of the cathedral, possibly it’s more like a photospot for tourists now.


    Adventure & Outdoor Activities

    Iloilo can be pretty exciting if you like a bit of adventure, even though we didn’t do all of them on our trip. Here’s what I did, and what I hope to try next time:

    Water Fun in Guimaras: We didn’t make it to Guimaras on this trip, but I’ve heard amazing things—snorkeling, kayaking, and paddleboarding in clear waters. Next time, that’s first on my list.

    Hiking & Scenic Spots: On this trip, we mostly stuck to city walks and Islas de Gigantes. But I’ve read that Garin Farm Pilgrimage Resort and nearby waterfalls have stunning views and are perfect for a day hike.

    Festival Fun: We missed the Dinagyang Festival this time, but if you time your trip right, jumping into street dances and boat races is supposed to be a blast. I’ll definitely be back for that!

    Personal Note: One thing we did manage to do was ride up going to the port jump off to Gigantes while catching sunrise. Even though I was half asleep, seeing the ocean glow in pink and gold – totally worth the early travel!


    Travel Tips to Make Your Trip Hassle-Free

    Even though we didn’t see everything Iloilo has to offer, getting around the city and Gigantes was smooth, and here are some tips from my experience:

    Getting Around: Jeepneys and tricycles in Iloilo City are super cheap and fun, while the ferry to Gigantes was easy to book if you plan ahead.

    Packing Essentials: Light clothes, sunscreen, and comfortable shoes are a must. Waterproof bags, insect repellent and emergency medicines are a must!

    Where to Stay: We stayed in Iloilo City to make sure that everything is within reach.

    Safety Tip: Iloilo is generally safe. I never had any issues, but in crowded areas—like the market or ferry—just keep an eye on your things.


    Suggested Itinerary for 3–5 Days in Iloilo

    Here’s a more honest version based on what I actually did, with a few extras for inspiration:

    Day 1: Explore Iloilo City—wander through Jaro Cathedral and Molo Church, and stroll along Calle Real.

    Day 2: Ferry to Islas de Gigantes—island hopping, exploring rock formations, and soaking in the beaches. Sunrise here is unforgettable.

    Day 3: Back in Iloilo City—eat your way through local favorites, and maybe sneak in a visit to some ancestral streets in Jaro.

    Day 4 (Optional): Next time, I’d love to add Guimaras for mango-tasting, biking, and beaches.

    Day 5 (Optional): If I get another visit, I’d explore Garin Farm and some waterfalls nearby for a bit of hiking and nature adventure.

    Wrapping it Up

    Iloilo, with its rich cultural heritage and natural wonders, is a captivating destination in the Philippines. While you can visit Iloilo throughout the year, the best time to experience its vibrant spirit is during the Dinagyang Festival in January.

    This festival honors Santo Niño and showcases colorful parades, dynamic street dances, and cultural performances that truly immerse you in Iloilo’s lively culture. Beyond the festival, Iloilo offers a wealth of attractions and activities. Explore the historic Jaro Cathedral, one of the oldest churches in the country, and witness the revered statue of Our Lady of the Candles.

    Iloilo’s combination of history, culture, and natural wonders make it a destination that captivates travelers. Plan your trip accordingly to coincide with the Dinagyang Festival or choose a time that suits your preferences, and get ready to be enthralled by the charms of Iloilo.

  • Where is Bacolod City located?

    Nestled in the western part of the Visayan island group in the Philippines, Bacolod is the capital city of the province of Negros Occidental. Known as the “City of Smiles,” Bacolod is famous for its vibrant MassKara Festival, a joyous celebration filled with colorful masks and street dancing.

    Now you’ve answered “where is Bacolod City located”, you might read and hear a lot about its festive atmosphere. Bacolod offers a rich cultural heritage, with numerous heritage houses showcasing intricate architectural designs. The city is also renowned for its delectable local cuisine, particularly the mouthwatering chicken inasal and sweet delicacies like piaya and napoleones.

    Related Articles:

    >> Best Time to Visit Bacolod and Things To Do On Your Trip
    >> Tourist Spots in Bacolod and Sample Itineraries
    >> What Food To Eat iin Bacolod + Food Trip Map

    Visitors can explore the iconic landmarks such as the San Sebastian Cathedral and the Capitol Park and Lagoon, where they can relax amidst beautiful scenery. Nature lovers can venture outside the city to discover the scenic landscapes of Mambukal Mountain Resort or take a refreshing dip in the pristine waters of Campuestohan Highland Resort.

    Bacolod’s warm and friendly locals add to the charm of this vibrant city, making it an enticing destination for travelers seeking a taste of authentic Filipino culture and hospitality. Bacolod is a highly urbanized city located in the province of Negros Occidental, Philippines. Bacolod is known as the “City of Smiles” due to its friendly and hospitable locals.

    The city is famous for its colorful MassKara Festival, a vibrant celebration of art, culture, and music. Bacolod offers a mix of historical landmarks, such as the San Sebastian Cathedral and The Ruins, a majestic mansion ruins surrounded by gardens.

    The city is also renowned for its delectable cuisine, with specialties like chicken inasal and sweet treats like piaya and napoleones. Bacolod’s warm atmosphere, cultural richness, and gastronomic delights create a delightful destination for travelers.


    Getting Around Bacolod

    Local taxis, jeepneys, and tricycles are available for getting around Bacolod City.

    Itinerary Sample

    Simple 3 Day Itinerary

    Day 1: Visit The Ruins, explore Negros Museumry local delicacies at Manokan Country, visit San Sebastian Church
    Day 2: Daytrip to Lakawon Island Resort.
    Day 3: Explore Mambukal Resort, go on a food trip at Aida’s Chicken and find local delicacies like napoleones.


    The city’s distinct character is showcased through its annual MassKara Festival, a vibrant celebration of music, dance, and colorful masks. Bacolod is a food lover’s paradise, offering a wide array of delectable dishes, including the iconic chicken inasal, a grilled chicken marinated in a unique blend of spices.

    Featured image for Where is bacolod city located

    Visitors can explore historical landmarks such as the San Sebastian Cathedral and the Ruins, a magnificent mansion turned heritage site. For nature enthusiasts, a visit to the Mambukal Mountain Resort provides an opportunity to soak in hot springs, trek through lush forests, and marvel at stunning waterfalls. Bacolod’s charm lies in its combination of rich heritage, delectable cuisine, and warm hospitality, making it a must-visit destination in the Philippines.

     
  • Check out this Gigantes Islands Tour for Your Iloilo Trip

    Located in the municipality of Carles, Iloilo, the Gigantes Islands are a captivating group of islands composed of Gigantes Norte and Gigantes Sur. Their name comes from the enormous extinct clams, locally called “taklobo” or giant clams, that used to inhabit the area. Today, these islands have become a paradise for travelers looking for a tropical getaway off the beaten path.

    With its pristine beaches, dramatic limestone cliffs, enchanting caves, and panoramic views, Gigantes Islands is a dream destination for nature lovers, adventure seekers, and anyone who simply wants to unplug and soak up the sun. And the best way to experience it all in one day? A Gigantes Islands day tour from Iloilo.

    This tour is typically a full-day experience, lasting around eight hours, and includes stops at the most iconic spots in the islands as well as a delicious lunch featuring unlimited scallops—yes, all you can eat!

    The Gigantes Islands Tour from Klook is typically a half-day tour that includes a lunch buffet featuring unlimited scallops!

    (You can click the QR below too)

    Iloilo, a province in the Philippines known for its rich culture, historical sites, and mouthwatering cuisine, offers visitors a plethora of experiences to enjoy. Among the many attractions in Iloilo, one standout destination is the Gigantes Islands, a hidden gem waiting to be explored.

    With its stunning landscapes, crystal-clear waters, and pristine beaches, a day tour to Gigantes Islands promises an unforgettable adventure.

    In this comprehensive guide, we will delve into everything you need to know to make the most of your Gigantes Islands day tour during your Iloilo trip.

    [tp_widget][/tp_widget]

    Getting to Gigantes Islands

    • To embark on your Gigantes Islands day tour, you will first need to make your way to Carles, the gateway to the islands.
    • From Iloilo City, you can take a bus or van to Carles, which is approximately a three-hour journey. (As for us we rented a car to get to Carles)
    • Once you arrive in Carles, you will find numerous boat operators offering island-hopping tours to Gigantes Islands. It is advisable to arrange your tour in advance to ensure a smooth experience.
    • The boat ride from Carles to Gigantes Islands takes around one to two hours, depending on the weather conditions.

    Weather & Water Conditions: What to Keep in Mind

    It’s important to note that some islands or attractions may be skipped depending on sea conditions or the weather.

    The Philippines’ waters can be unpredictable, especially during the rainy season or when winds pick up. For example, if the tide is too high, certain sandbars like Bantigue may be partially submerged, and lagoons like Tangke might be inaccessible. Similarly, rough waters can delay or reroute boat schedules for safety reasons.

    Your tour guides are experienced and will make adjustments to ensure everyone’s safety while still giving you the best possible experience. Even if a few stops are skipped, the day still offers plenty of breathtaking scenery, fun in the water, and that unforgettable seafood lunch.

    Island-Hopping Adventure: Gigantes Island Tourist Spots

    he Gigantes Islands day tour typically involves exploring the different islands and attractions in the area. Here are some of the highlights you can expect during your island-hopping adventure:

    Cabugao Gamay Island – This is the showstopper. Famous for its powdery white sand, swaying coconut trees, and turquoise waters framed by limestone cliffs, Cabugao Gamay is the ultimate postcard-perfect spot. Climb to the viewpoint for breathtaking vistas, snap your photos, or simply lounge on the sand and take it all in.

    Tangke Saltwater Lagoon

    Tangke Saltwater Lagoon – Tucked between towering limestone formations, Tangke Lagoon is a serene natural pool perfect for a refreshing dip. The emerald-green waters and surrounding cliffs make it feel like a secret oasis, a quiet spot to escape the sun-drenched beaches.

    Bantigue Sandbar – One of those Instagram-worthy stretches of powdery white sand that emerges during low tide, Bantigue Sandbar is flanked by crystal-clear waters on both sides. Walking along this sandbar feels almost surreal—you’ll want to take your time and soak in the beauty.

    Antonia Beach – If you’re craving some calm, Antonia Beach is perfect for relaxing. With soft sand, clear waters, and a peaceful atmosphere under the shade of coconut trees, it’s a great spot to just chill, swim, or beachcomb.

    Mini Boracay – Small but spectacular, this beach rivals its famous namesake with its powdery sand and clear waters. Even for a quick stop, you’ll see why it earned its nickname.

    Pulupandan and other hidden spots – Depending on tide and weather, your tour may also include stops at other secretive beaches and coves where you can swim, snorkel, or just marvel at the views.

    Along the way, your guides will make sure you capture all the best photo spots and navigate the islands safely and efficiently.

    Exploring the Caves (You might need more days and a different tour to explore these!)

    Gigantes Islands is not only known for its breathtaking beaches but also for its fascinating caves. During your day tour, make sure to include visits to these remarkable natural wonders:

    1. Pawikan Cave: Pawikan Cave derives its name from the sea turtles, or “pawikan,” that used to lay their eggs in the area. The cave boasts intricate rock formations, stalactites, and stalagmites. Exploring the cave with a knowledgeable guide adds an element of adventure to your trip.
    2. Bakwitan Cave: Bakwitan Cave is an enchanting cave that has captivated visitors with its stunning rock formations and crystal-clear waters. The cave is known for its impressive stalagmites resembling inverted mushrooms. Take a refreshing dip in the cool waters inside the cave and marvel at its natural beauty.

    No trip to Gigantes Islands is complete without tasting the local seafood.

    During the tour, you’ll enjoy a sumptuous lunch at Lantangan Beach featuring all-you-can-eat scallops, rice, and coffee. Fresh, locally sourced, and absolutely delicious, this is one of those meals you’ll remember long after the trip.

    Don’t forget to try other seafood treats if available, like squid or prawn chicharrón—it’s a taste of the islands you can’t miss.

    The Klook tour includes an eat-all-you-can-scallop deal which is truly a steal! where else can you get that right?

    Gigantes Islands Tour for Your Iloilo Trip featured iamge scallops

    Practical Tips for Your Gigantes Islands Tour

    To make the most of your Gigantes Islands day tour, keep these practical tips in mind:

    1. Plan ahead: It is advisable to plan your Gigantes Islands day tour in advance to secure boat reservations and ensure a smooth experience.
    2. Pack essentials: Bring essentials such as sunscreen, a hat, sunglasses, insect repellent, and a reusable water bottle. Don’t forget to pack your swimwear and a waterproof bag for your gadgets and valuables.
    3. Respect the environment: As a responsible traveler, make sure to respect the environment and leave no trace behind. Avoid littering and follow the instructions of your tour guide to protect the fragile ecosystems.
    4. Stay hydrated and nourished: Keep yourself hydrated throughout the day by drinking plenty of water. Bring snacks or have a hearty meal before your tour to keep your energy levels up.
    5. Capture memories: Gigantes Islands offers breathtaking scenery, so don’t forget to bring your camera or smartphone to capture the mesmerizing landscapes and unforgettable moments.

    Why This Day Tour is Worth It

    Even though it’s just one day, this tour offers an incredible amount of adventure, relaxation, and breathtaking scenery. You’ll hop between islands, explore lagoons, stroll along sandbars, swim in crystal-clear waters, and savor fresh seafood—all under the guidance of friendly local experts who know every corner of the islands.

    By the time you return to Carles in the late afternoon, you’ll be sun-kissed, happily tired, and carrying memories (and photos) that will last a lifetime. For anyone visiting Iloilo, a Gigantes Islands day tour isn’t just an option—it’s a must-do.

    Whether you go solo, join a group, or book a private tour, this adventure promises an unforgettable slice of paradise in the Philippines.